Create/Modify LVM Physical Volumes, Volume Groups and Logical Volumes on Ubuntu 16.04

It’s pretty straight-forward, but before you start, you need to check for block devices that can be used to create physical volumes:

sudo lvmdiskscan

You will see a result that looks like this:

/dev/ram0 [ 64.00 MiB]
/dev/sda [ 50.00 GiB]

1 disk

Just ignore all the /dev/ram* and notice the /dev/sda drive, this is the one that you will need.

Afterwards, you need to do the following, I will assume I have one block device, then will create one physical volume, one logical volume (taking all free space) and one volume group:

  1. sudo pvcreate /dev/sda
    
    Physical volume "/dev/sda" successfully created
  2. sudo vgcreate vgData /dev/sda
    
    Volume group "vgData" successfully created
  3. sudo lvcreate -l 100%FREE -n lvData1 vgData
    
    Logical volume "lvData1" created.
  4. sudo mkfs.ext4 /dev/vgData/lvData1
    
    mke2fs 1.42.13 (17-May-2015)
    
    Discarding device blocks: done
    
    Creating filesystem with 13106176 4k blocks and 3276800 inodes
    
    Filesystem UUID: e2ce00dd-236a-474d-b773-033e1cb7cb55
    
    Superblock backups stored on blocks:
    
    32768, 98304, 163840, 229376, 294912, 819200, 884736, 1605632, 2654208,
    
    4096000, 7962624, 11239424Allocating group tables: done
    
    Writing inode tables: done
    
    Creating journal (32768 blocks): done
    
    Writing superblocks and filesystem accounting information: done
  5. sudo mkdir /mnt/webdata
  6. sudo mount /dev/vgData/lvData1 /mnt/webdata
  7. To make it permanent on system boot, add the following entry to /etc/fstab:
    /dev/vgData/lvData1 /mnt/webdata ext4 defaults,nofail 0 0

In order to extend an existing VG with additional disks, you need to do the following (assuming sdc is the new disk)

  1. sudo pvcreate /dev/sdc
  2. sudo vgextend vgData /dev/sdc
  3. sudo lvextend -l 100%FREE --resizefs /dev/vgData/lvData1 #to add the pv to the existing lv

Update:

For disks exceeding 2 TB, you have to use GPT, so before doing any of the above steps:

sudo parted /dev/sdc
mklabel gpt
mkpart primary 0GB 100%
q

Then you have a new partition /dev/sdc1 that you need to convert to a physical volume and continue all the steps normally.

That’s it, Enjoy!

Sources:
  1. https://www.digitalocean.com/community/tutorials/an-introduction-to-lvm-concepts-terminology-and-operations
  2. https://www.digitalocean.com/community/tutorials/how-to-use-lvm-to-manage-storage-devices-on-ubuntu-16-04
  3. http://tldp.org/HOWTO/LVM-HOWTO/extendlv.html
  4. https://gist.github.com/holms/7480084
Posted in Linux, linuxmint, Ubuntu, Uncategorized | Tagged , | Leave a comment

How to allow non-root user to capture packets with Wireshark on Ubuntu 16.04

Only two steps you need to do:

  1. “sudo dpkg-reconfigure wireshark-common” (choose yes to allow Dumpcap to make the wireshark group members able to capture packets)
  2. “sudo adduser USERNAME wireshark” to add your user to the wireshark group

Then you just need to logout and back in.

This was tested successfully on Ubuntu 16.04

Enjoy!

Sources:

Posted in Linux, linuxmint, Uncategorized | Tagged , , , , | Leave a comment

How to change default desktop environment in Debian

sudo update-alternatives –config x-session-manager
There are 2 choices for the alternative x-session-manager (providing /usr/bin/x-session-manager).

Selection    Path                    Priority   Status
————————————————————
* 0            /usr/bin/gnome-session   50        auto mode
1            /usr/bin/gnome-session   50        manual mode
2            /usr/bin/mate-session    30        manual mode

Press <enter> to keep the current choice[*], or type selection number: 2
update-alternatives: using /usr/bin/mate-session to provide /usr/bin/x-session-manager (x-session-manager) in manual mode

Source: http://crunchbang.org/forums/viewtopic.php?id=37543

Posted in Linux, Uncategorized | Tagged , , , , , | 2 Comments

Compile & Install virt-manager 1.4 on Ubuntu 16.04 and Linux Mint 18

The latest virt-manager supports configuring VMs for OpenGL passthrough for 3D acceleration in virtual machines plus a SPICE console that can make good use of that, which I have been waiting A LOOONG TIME for!

Unfortunately, the default package on the latest Ubuntu stable release is 1.3, and I couldn’t find any available PPA or pre-compiled packages for it, so I had to compile it myself.

Here is what I have done (I have installed QEMU & KVM as well):

sudo apt-get build-dep virt-manager
sudo apt-get install qemu-kvm libvirt-bin ubuntu-vm-builder bridge-utils python-libvirt libgtk-3-dev libvirt-glib-1.0 gir1.2-gtk-vnc-2.0 gir1.2-spice-client-gtk-3.0 libosinfo-1.0 python-ipaddr gir1.2-vte-2.91 python-libxml2 python-requests libvirt-glib-1.0-dev
wget https://virt-manager.org/download/sources/virt-manager/virt-manager-1.4.0.tar.gz
tar -xvzf virt-manager-1.4.0.tar.gz
cd virt-manager-1.4.0/
sudo python setup.py install

Don’t forget to log out and then back in, since your user have been added to the libvirtd group.

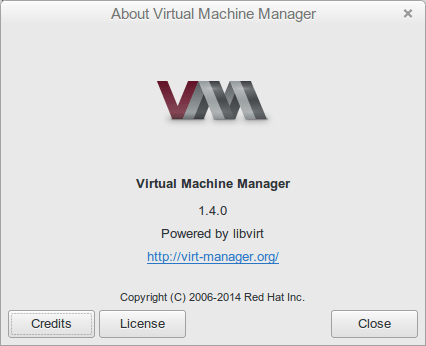
And there you go:

Screenshot from 2016-08-14 23-28-11

Sources:

These instructions work perfectly on Linux Mint 18 as well.

Enjoy!

Posted in Linux, Ubuntu | Tagged , , , , , | 3 Comments

Multi-hop SSH Connection

The case is as follows:

You have a server, let’s name it “server2” that you need to SSH to, but unfortunately this server is not directly accessible, as you can SSH to it only through another server, let’s call it “server1”.

Normally, what you will do is connect via SSH to “server1” first, then connect to “server2”. This is really annoying; having to run two commands to access a single server and having to wait for their completion.

All you have to do is the following command to be able to access “server2” using a single command:

ssh -A -t user@server1 ssh -A -t user@server2

But, there is only one prerequisite to this, which needs to be done once and for all, that is the password-less login using the Private-Public key authentication (ssh-keygen, ssh-copy-id …etc)

Source: http://sshmenu.sourceforge.net/articles/transparent-mulithop.html

Posted in Linux, Uncategorized | Tagged , , , | Leave a comment